
In the previous post the scripting needed for multi-linecard switches like the 6500 was discussed. In this post we will finally deploy the configs we have created through our scripts using the Prime Deployment function.
To start we simply go to our config template and open it in Prime. We can see the script in the bottom pane of the screen and the Deploy button is available at the top of the page.
Once we click Deploy we are presented with a screen to select the switches to which we want to deploy the configs.
To filter by a specific switch name of prefix, Hit the filter icon and enter the name. As devices are selected with the checkbox, they will add the Device to Deploy area. When all devices to deploy are selected click Next.

The next area is the Workflow screen. We did not do anything in this area and just clicked Next.
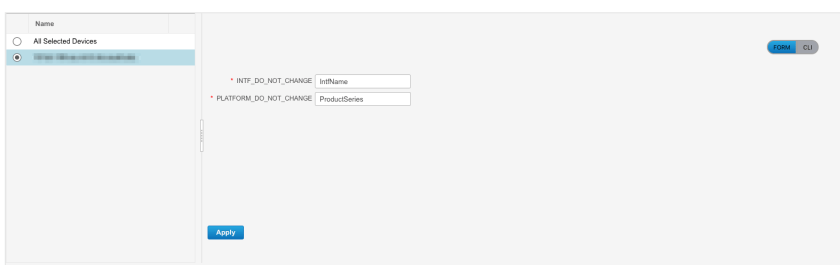
This then displays the devices selected and we now can see the form created when the script was written which is where, like in the case of the 6500, lincecards can be selected. This area also has an option in the right corner to check the CLI commands against the device verified to make sure the commands are compatible.

After clicking Next we are presented with the Deployment Options area. We did a couple of different ways of deployment, On-Demand and Scheduled.
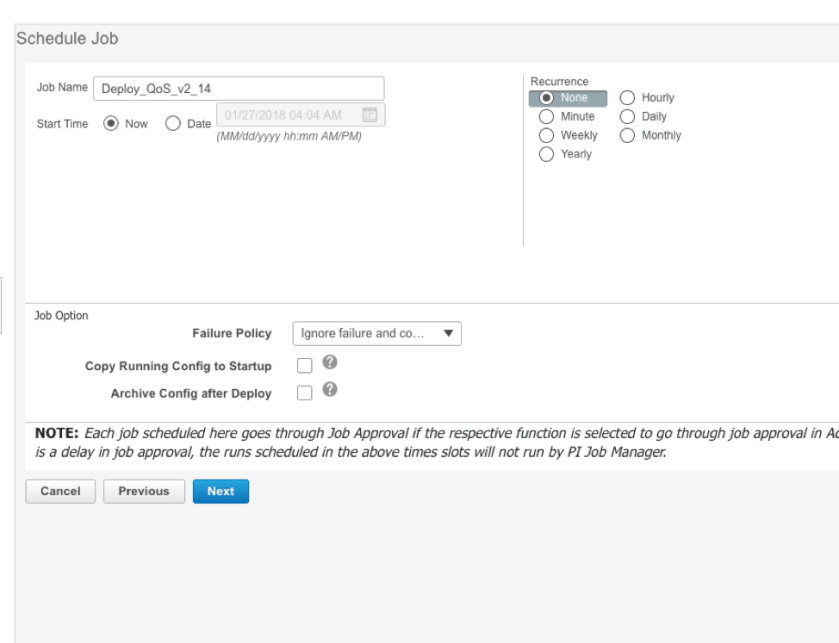
On-Demand is when selecting the Now radio button then Next. If deployment is to be scheduled at another date and time, this can be accomplished us the Date radio button and selecting the appropriate Date/Time. Be careful as this is the Date/Time of the sever. If your server is centralized in a data center and your site is in another time zone this needs to be taken into account.
There are a couple other options at the bottom of this screen that help to make sure we do not lose our config that we have worked on so hard, Copy Running Config to Startup and Archive Config After Deployment. These are fairly self-explanatory, but the second option is used if you are archiving your device configurations to the Prime Server for back-ups.
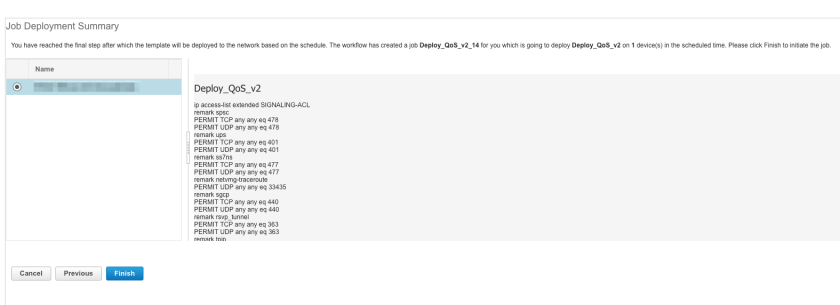
Once we click Next we get the final Deploy verification screen, this is our last point of turning around. Once Deploy is clicked the job will begin running in Prime and we can only abort it in the Job Dashboard.
At this point, sit back and have some coffee or something stronger, and wait to see the job complete in Job Dashboard. Depending on the number of devices the config is being pushed to and how large the config ended up being, this can take upwards of 20+ minutes to complete. You can keep an eye in it in Job Dashboard and make sure all devices are successfully being deployed to.
Some gotchas that gave us a little grief.
Portchannels. Depending on the model of switch, the portchannels have to have imnput part of the port config added to physical and the output added to the portchannel. We did this manually as it was easier and fee and far between, but with testing you could add this part to your script.
Random Errors. We would occasionally receive an error that a timeout occurred pushing the config to the switch. After doing research and looking at the actual switch it was determined the config would actually push and we never really figured out why this error would occur. If anyone else has seen this and has any further info, please let me know and I will update this with that info.
With that we complete the look at using Cisco Prime to push QoS configs to ~1,000 switches in the wild. I genuinely hope this helps some other folks out there and provides some info to all.
Look for more coming soon.
